Setup RevenueCat
Step-by-step guide to setup RevenueCat for your Flutter app
Create a RevenueCat Project
Google Play
Create Subscriptions
You will need to upload an APK before you can add a subscription
In the Google Play Console, select your app.
- Expand the “Monetize with Play” section
- Select “Products”
- Select “Subscriptions”
Enable APIs
In the Google Cloud Console, select your project from the dropdown. Enable both the Google Play Android Developer and Google Play Developer Reporting APIs.
Create a Service Account
Navigate to the Service Accounts page in Google Cloud. Select “Create Service Account”.
- Add a name
- Add the Pub/Sub Editor and Monitoring Viewer roles
- Press Done
On the Service accounts page, select the 3 dots next to the service account you just created and select “Manage Keys”.
- Select “Add key”
- Select “Create new key”
- Select “JSON”
- Select “Create”
The key will be auto-downloaded.
Copy the Email of the new Service account.
Invite the Service Account to Google Play
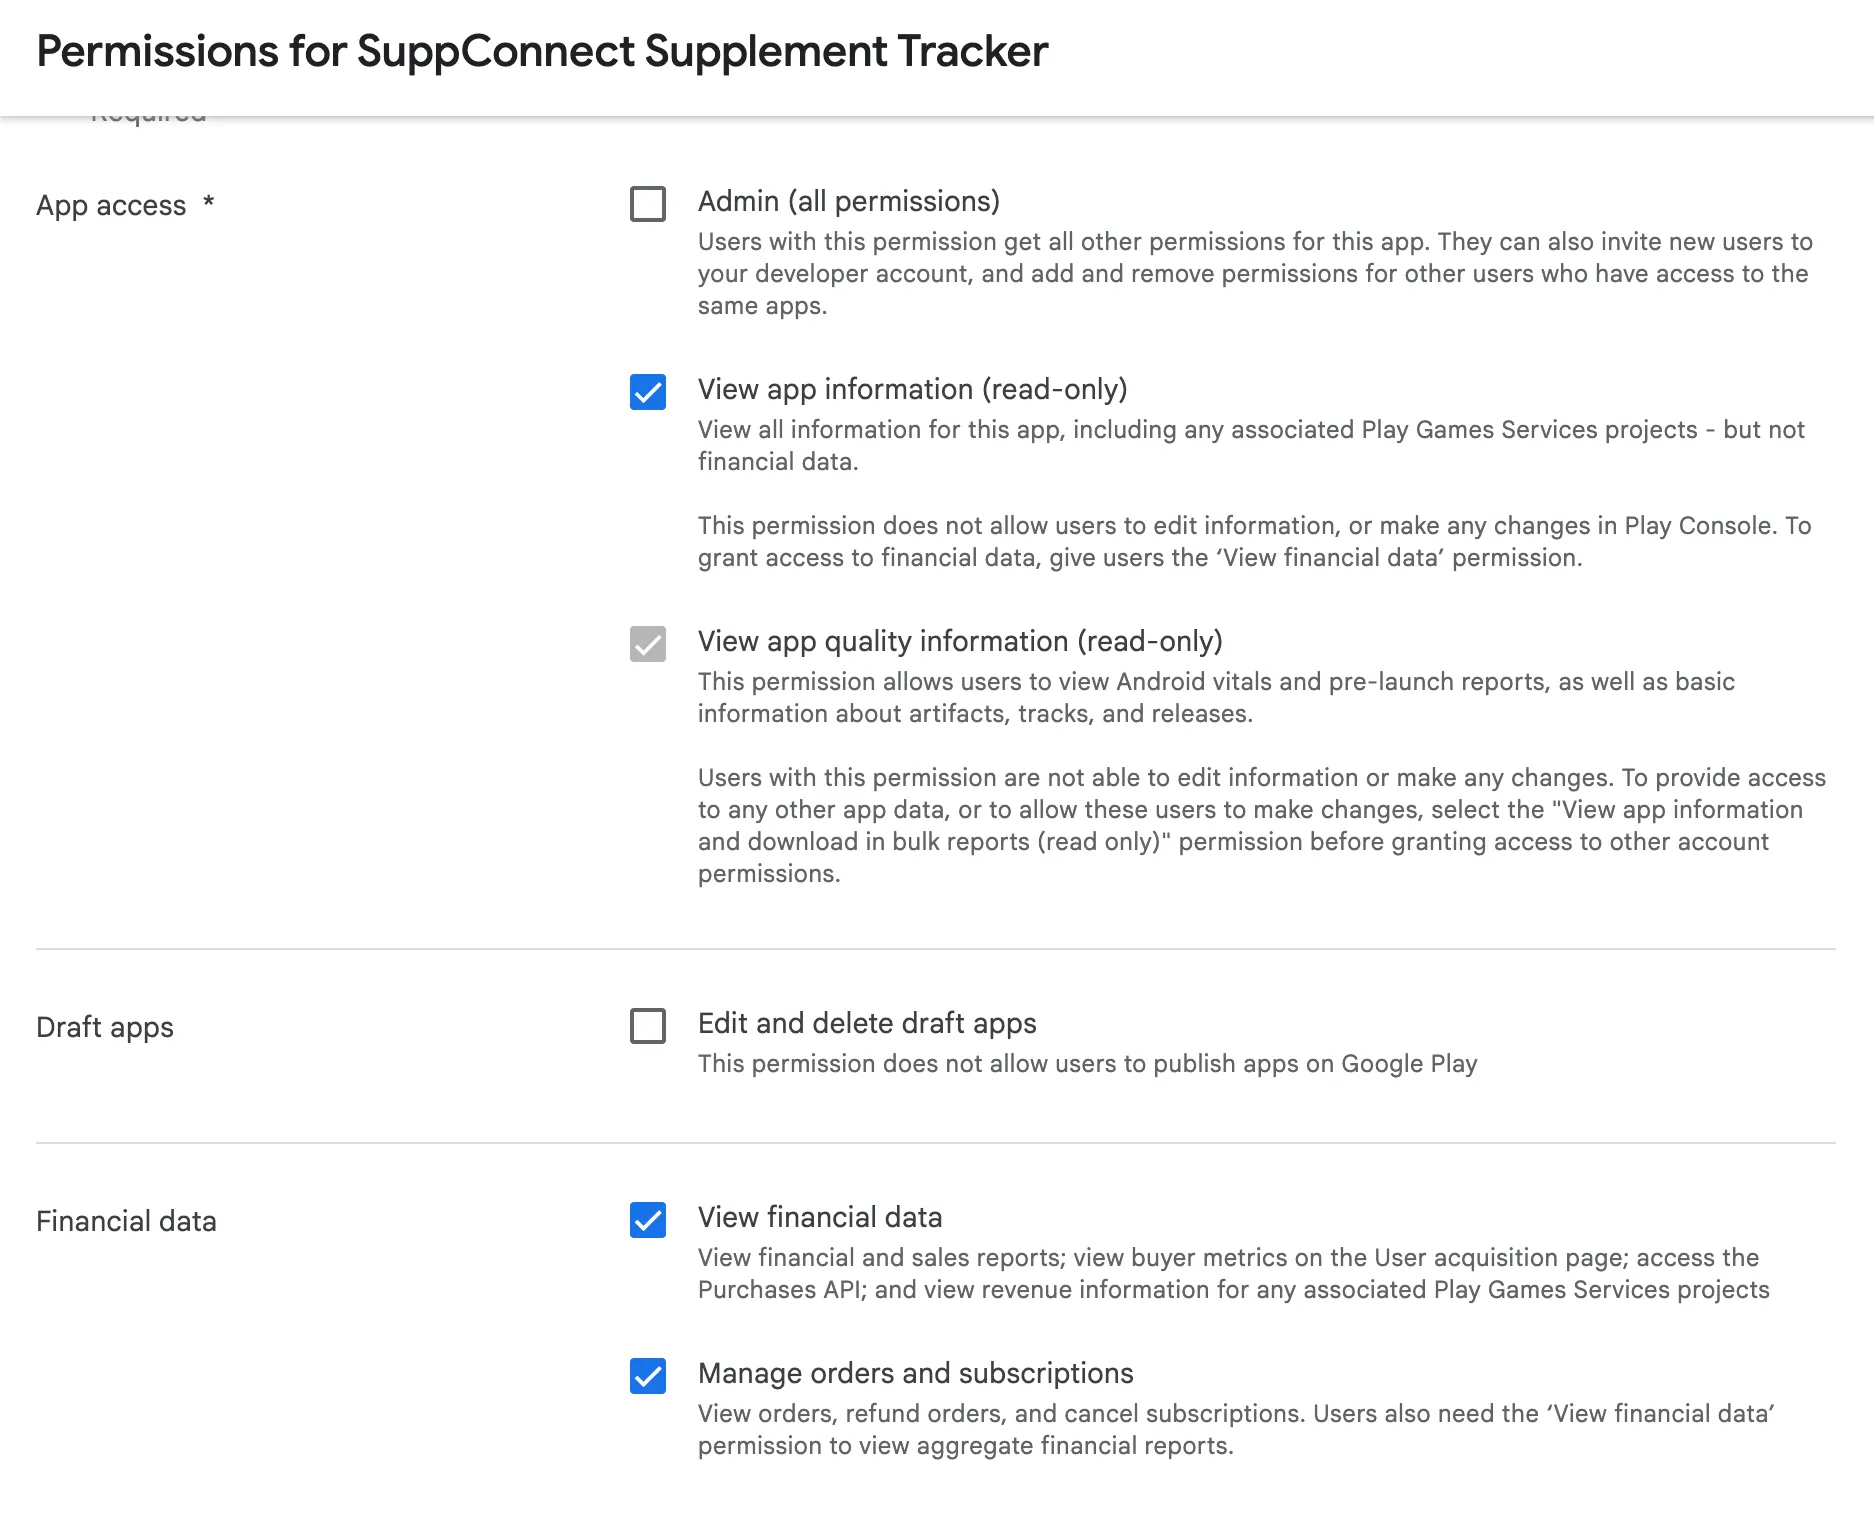
In the Google Play Console on the Users and Permissions tab, select “Invite User”. Paste in the email from the previous step. Add the following permissions:

Select “Send Invite”.
Add the Service Account to RevenueCat
In the RevenueCat dashboard:
- Select your app
- Select “Apps & Providers”
- Select your android app (or create one)
- Add the Service Account JSON and wait ~24 hours
Apple App Store
Create Subscriptions
Create an In-App Purchase Key
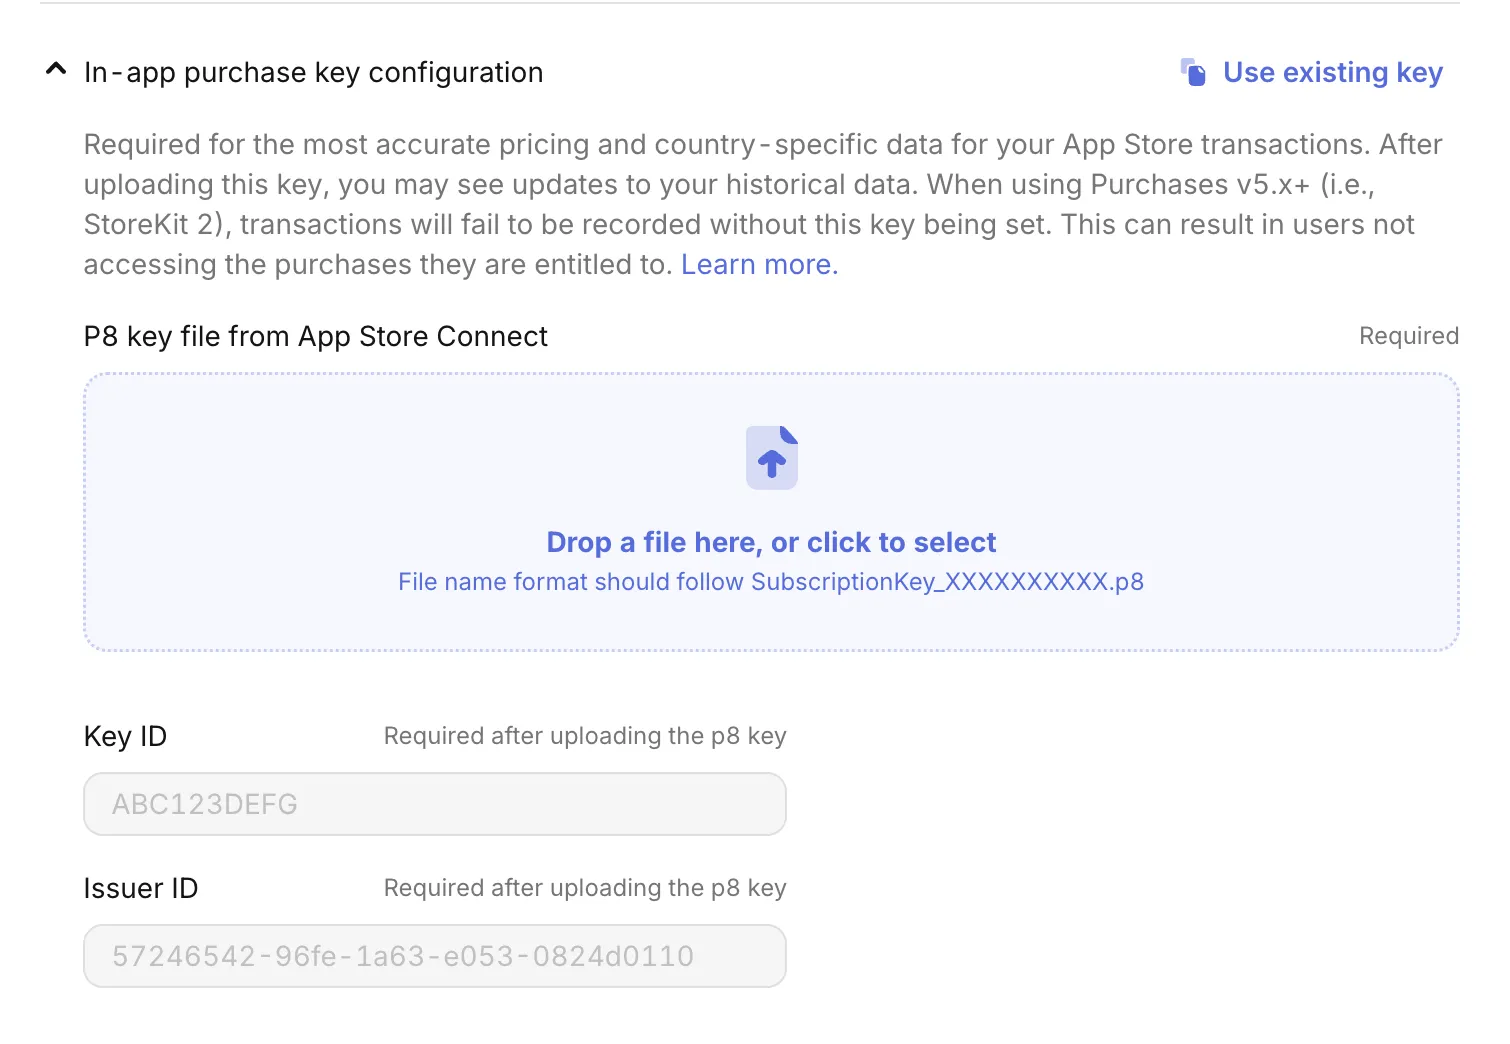
Add the In-App Purchase Key to RevenueCat
If you already have an iOS app that uses RevenueCat, you can reuse the In-app purchase key. Just select “Use existing key” and select the one for your existing app.

Save changes.
Create an Entitlement
In the RevenueCat dashboard, select your app:
- Select the “Product Catalog” from the sidebar
- Select the “Entitlements” tab
- Click “New Entitlement”
- Give the entitlement a name (ex. “premium”) and a description (ex. “Access to premium features”)