I’ve used Google’s Firebase/Firestore database solution for nearly 6 months and had come to believe that it was an unstoppable force. If you’re only dealing with numbers, strings, and other simple data forms, this is true. The NoSQL database gives you immense control over how you store information a provides querying tools that can be used to find items meeting very specific criteria in a snap.
But if you’re interested in storing and retrieving larger files like images and audio clips, Firestore is not the solution you need.
Instead, you’ll need to use Cloud Storage. Google designed this storage solution specifically for storing user-generated content like images and videos and behind the scenes it features cool benefits like intermittent uploading and downloading based on your app’s connectivity status.
Goal
This article will explain how to let your users select an image from their device, upload it to Cloud Storage, and save references to those images into Firestore for quick retrieval.
This tutorial will be structured as if you’ll be adding this feature to an existing app (and not as if you’re starting from scratch).
Setup
Plugins
To begin, you’ll need a few plugins.
- Image Picker: Allows the user to select an image file from their device or take a new picture using their camera
- Firebase Storage: Allows the app to access the Cloud Storage for this Firebase project
- Cloud Firestore: Allows the app to use the Cloud Firestore API
- Firebase Core: Mandatory plugin for using Firebase products
image\_picker: ^0.6.7+11
firebase\_storage: ^4.0.1
cloud\_firestore: ^0.14.0+2
firebase\_core: ^0.5.0+1
Follow the instructions in the setup sections for each of these plugins and then continue to the next step.
Cloud Storage
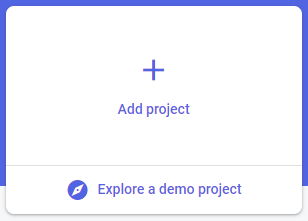
1.If you don’t already have a Firebase project, you will need to navigate to your Firebase console and Add one.
2.Once you have a project set up, you’ll need to select “Storage” on the left-hand sidebar.
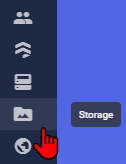
- Press “Get Started”
If you run into API keys later on, it’s always a good first step to redownload your google-services.json file as your necessary keys may have changed.
This is really all you have to do to make Cloud Storage accessible. If you want to save the URLs to Cloud Firestore, you’ll also need to make sure that’s setup. Now let’s get to the fun part.
Image Picker
In order to save an image to Cloud Storage, we first need to have an image to save. Fortunately, there’s a super convenient Flutter plugin called image_picker that will allow our users to either select an image from their gallery or snap a new image. The snippet below is the entire function.
To reduce the size of the images before uploading them to Cloud Storage, you can use the built in imageQuality parameter of the ImagePicker plugin. Values can range from 0 to 100 with 100 being the max quality.
To call the function, just create a button and call getImage(). I added a boolean argument to the function to determine if you should use the user’s gallery or camera (true = gallery, false = camera).
In my example, I allow users to select more than one image so each time they tap on new image icon, I add the selected file to a list. If you only need a single image, just uncomment this line:
File \_image; // Used only if you need a single picture
Display the Image
Now that the image file is selected, you can display it easily using the following code snippet:
Container(
child: Image.file(\_image)
)
```Basic image display
Save the Image to Cloud Storage and Firestore
=============================================
Now that you have the file, you can save it to Cloud Storage and Firestore. This is where things can get a little tricky. When a file is saved to a Cloud Storage bucket, the entire file is stored and you can see this when you open Cloud Storage in the console.

In order to access the file you need the URL that points to it (the blue hyperlink in the image above). This is generated when the file has completed uploading and it’s what we’ll save to Firestore. The whole process has to be completed in steps:
1 — Create a reference to the Firestore document that will store the URL
DocumentReference sightingRef = Firestore.instance.collection(“sightings”).doc();
2 — Make a call to a saveImages function. This function is responsible for uploading the file to Cloud Storage _and_ adding the URL to the Firebase document
await saveImages(_images,sightingRef);Future saveImages(List _images, DocumentReference ref) async {
_images.forEach((image) async {
String imageURL = await uploadFile(image);
ref.update({“images”: FieldValue.arrayUnion([imageURL])});
});
}
The two parts to the saveImages function are described below.

2.1 — **Upload the file to Cloud Storage (uploadFile())**. In this step, an upload task is created to upload the given file to the specified path. Cloud Storage is structured similarly to Firestore, so you can create a reference to a non-existing location and then add the file there afterwards.

You can add folders and subfolders by adding “/” to your path name as shown below.
Future uploadFile(File _image) async {
StorageReference storageReference = FirebaseStorage.instance .ref()
.child(‘sightings/${Path.basename(_image.path)}’);
StorageUploadTask uploadTask = storageReference.putFile(_image);
await uploadTask.onComplete;
print(‘File Uploaded’);
String returnURL;
await storageReference.getDownloadURL().then((fileURL) {
returnURL = fileURL;
});
return returnURL;
}
2.2 — **Add a reference to the new file to Firestore**. In order to get the URL of the newly saved file, we need to await the uploadFile function. In short, (1) the file will be saved, (2) a URL will be returned, and (3) then the Firestore document will be updated.
As long as your document exists in Firestore, these steps will successfully add the image URL to the “images” field.

Retrieve the Image
==================
Once the image URL is successfully saved to Firestore, retrieving the actual image is a piece of cake. Simply retrieve the document, grab the URL from the “images” field, and display it using this snippet, where “i” is the URL string:
Container(
child: Image.network(i)
)
If you are not using Firestore to save the URLs, you can also retrieve them [directly from Cloud Storage](https://firebase.flutter.dev/docs/storage/usage#download-urls). This solution requires knowing the reference pathway and then querying it for the download URL.
Future<void> downloadURLExample() async {String downloadURL = await firebase_storage.FirebaseStorage.instance.ref(‘users/123/avatar.jpg’).getDownloadURL();_// Within your widgets:
// Image.network(downloadURL);
_}
In Conclusion
=============

If you haven’t used Cloud Storage before, it can be a bit intimidating. Luckily, using it in Flutter is extremely simple and with only a few functions, you’ll have nearly all you’ll ever need to handle, save, and retrieve image files.

References
==========

*   [Upload Image File To Firebase Storage Using Flutter](https://www.c-sharpcorner.com/article/upload-image-file-to-firebase-storage-using-flutter/)
*   [Firebase CloudStorage in Flutter](https://www.filledstacks.com/post/firebase-cloud-storage-in-flutter/)
*   [Using Cloud Storage](https://firebase.flutter.dev/docs/storage/usage)
*   [Cloud Storage Quotas](https://cloud.google.com/storage/quotas)

My Setup
========

I’m a self-taught developer who believes that marketable software solutions can be created by dedicated lone wolves (or _very_ small teams). I blog about development tools like Flutter, Google Firestore, and RevenueCat since I believe these will be staples of every successful mobile app start-up in the near future. With these in your arsenal, you can do the work of 4 or 5 people in a ridiculously short amount of time. I also blog about computer literacy and efficiency since both of those things have exponential returns.

Hardware
========

*   [Omen by HP Obelisk Desktop Computer](https://amzn.to/3ms7tHA)
*   [MacBook Pro with Intel Core i9](https://amzn.to/2EdH0wc)
*   [LG 27UL500 Monitor](https://amzn.to/3mzyfxY)
*   [Two HP 27" LED Monitors](https://amzn.to/33DGQqp)
*   [Corsair Scimitar Gaming Mouse](https://amzn.to/2FHrxVw)