Contents
I’ve been working on a handful of web apps made stylish by TailwindCSS but was a bit disappointed that I couldn’t easily figure out how to use a Google Font in place of the default font. This tutorial fixes that.
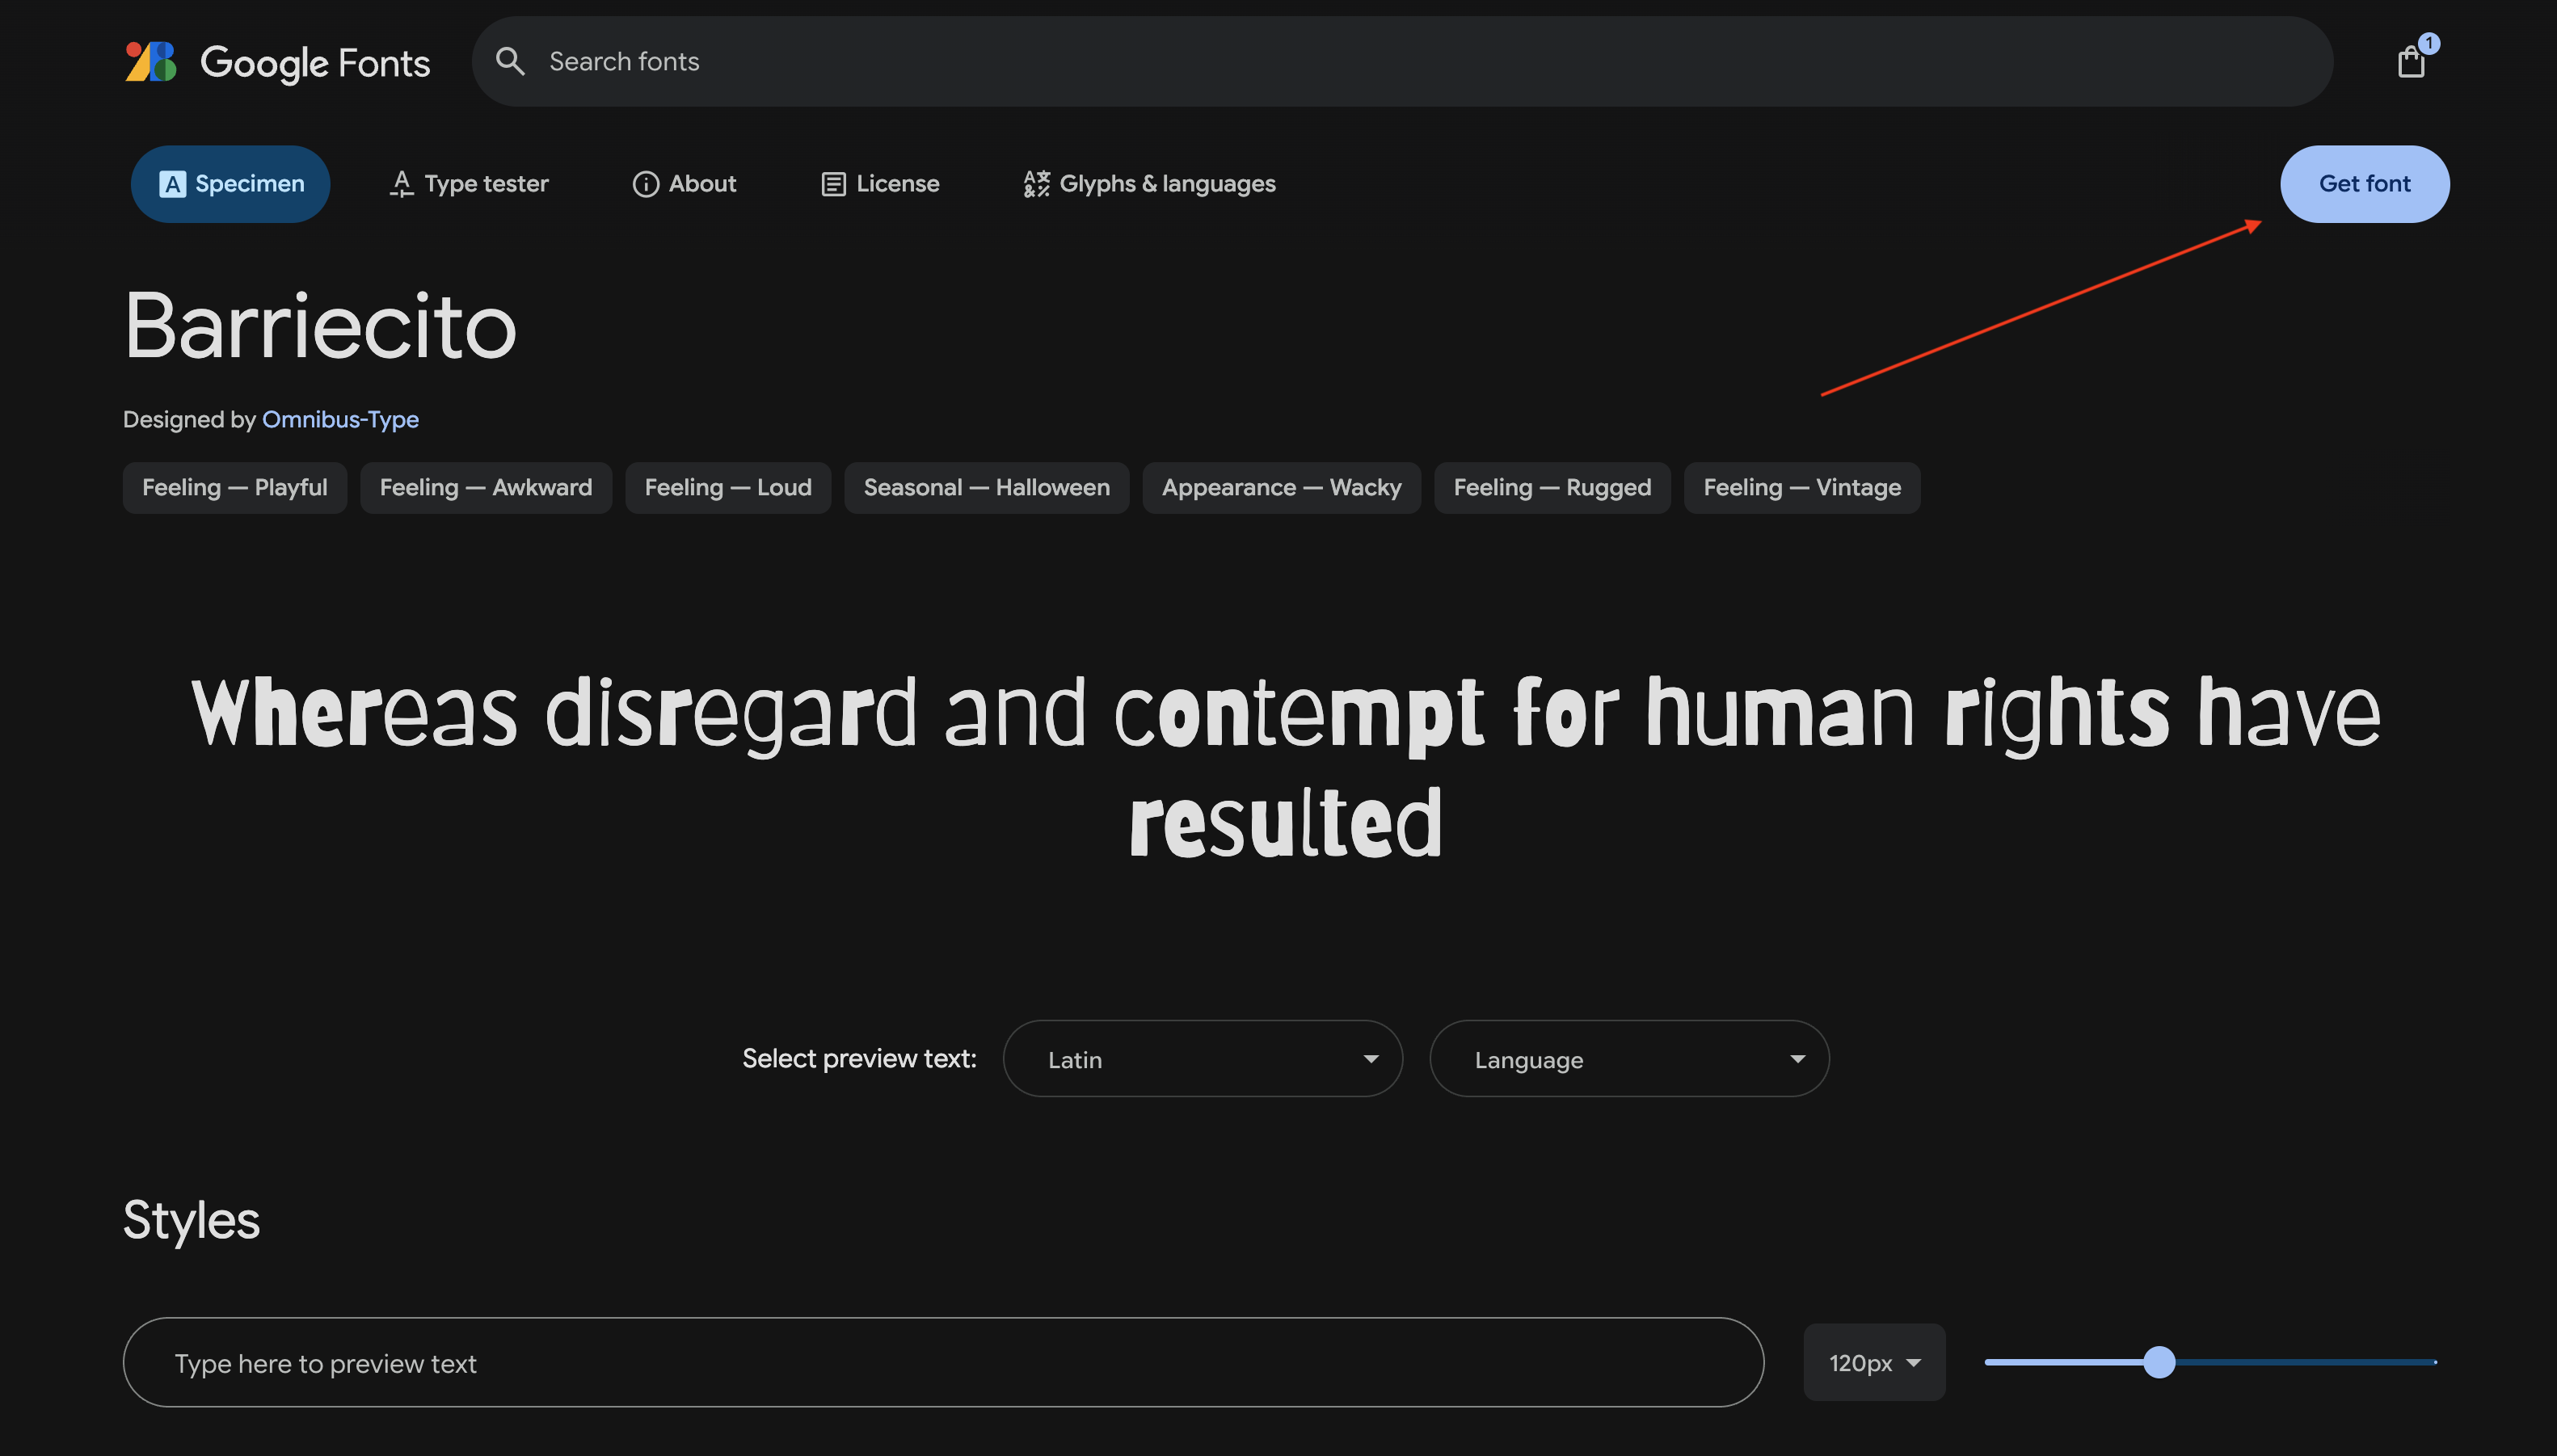
Find your Font
Go to Google Fonts and search for the font that fits your project. Once you’ve found it, click the “Get Font” button at the upper right of the screen:
Then click “Get embed code”. On the screen that pops up, make sure the “Web” tab is selected and then choose the “@import” radio button:
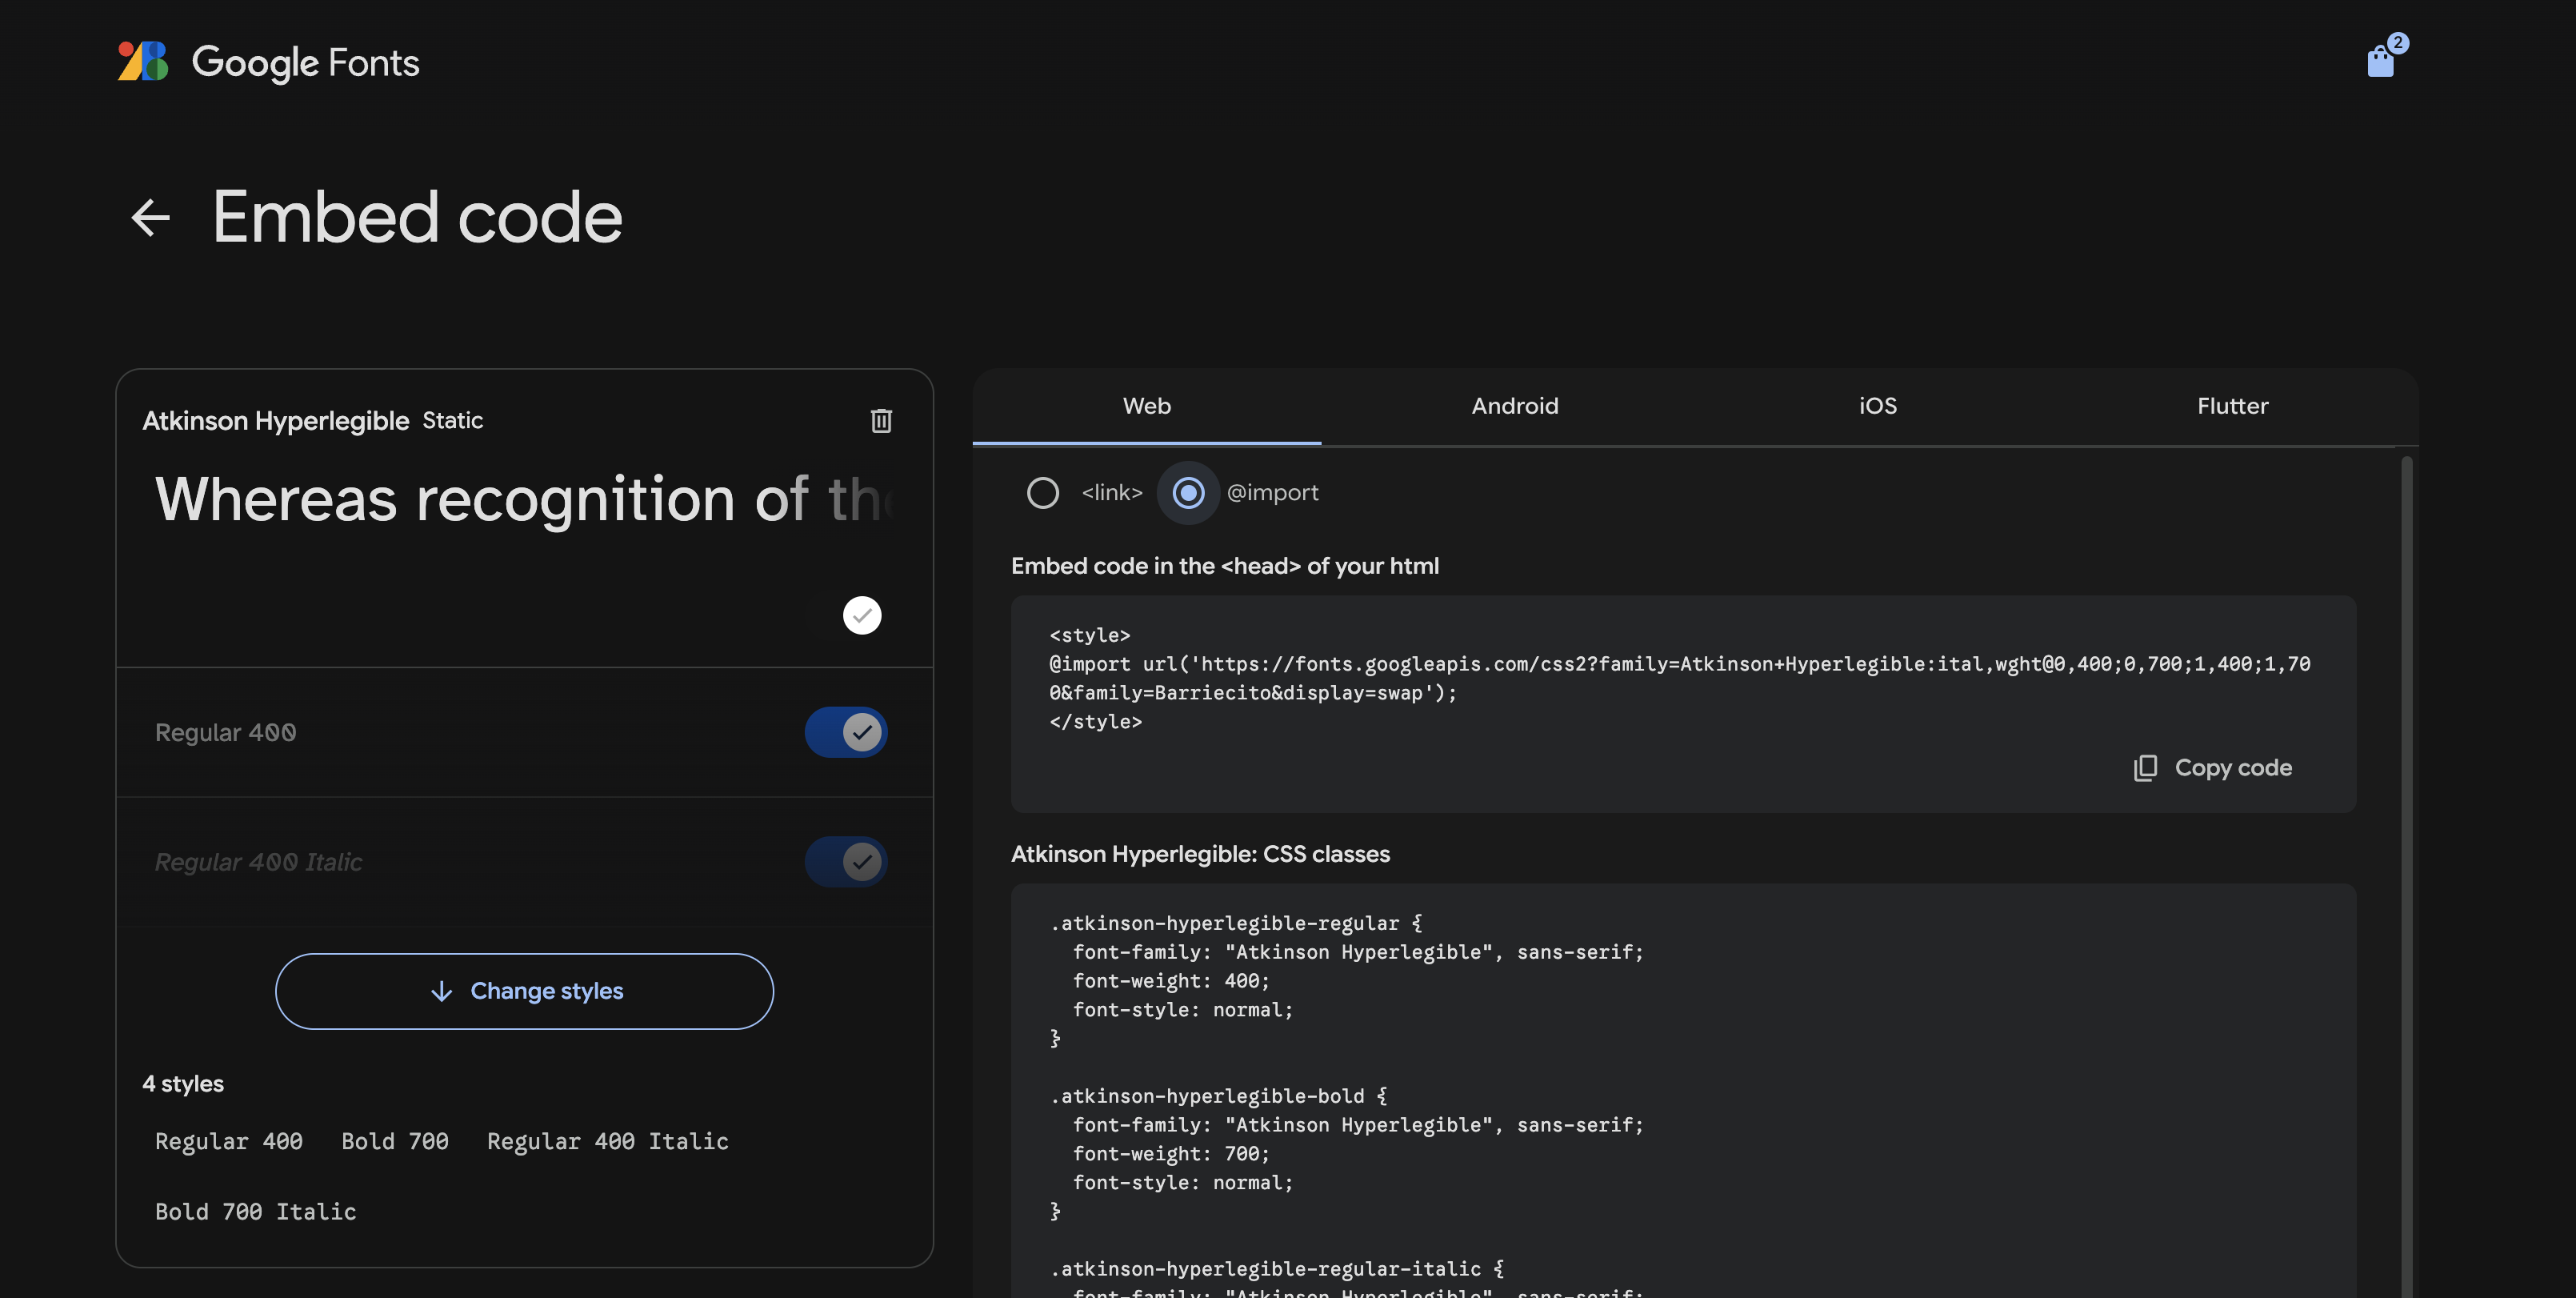
If you have multiple fonts in your bag, the embed page will have all of them listed
Copy the entire @import line for the next step.
Configure your Font
In your Tailwind project, navigate to your index.css file and paste the @import statement at the top.
Next, add an @theme section and define your fonts using the family name in the import URLs. If the family name includes a “+”, replace it with a space. For example:
@import url('https://fonts.googleapis.com/css2?family=Barriecito&display=swap');
@import url('https://fonts.googleapis.com/css2?family=Atkinson+Hyperlegible:ital,wght@0,400;0,700;1,400;1,700&family=Barriecito&display=swap');
@import "tailwindcss";

@plugin "@tailwindcss/typography";
@plugin "daisyui"{
  themes: light --default, dark --prefersdark, lemonade;
}

@theme {
  --font-barriecito: "Barriecito", cursive;
  --font-atkinson: "Atkinson Hyperlegible", sans-serif;
}
Set your Font
Now that your theme has been updated, navigate to wherever you add global styles to your app (ex. App.tsx or a shared Layout component). Add the --font-<family> directive.
const Layout: React.FC<LayoutProps> = ({ children, showSidebar = true }) => {

  // At the top level of your Layout component
  return (
    <div className="font-atkinson">
        ...
    </div>)
}
You can read more about configuring Tailwind Font Families.