Create a Chrome Extension With React, Typescript, and Tailwindcss
This article was inspired by Creating a Chrome Extension with React a Step by Step Guide.
For the full code, check out the repo.
Creating a Popup
Section titled “Creating a Popup”1. Create React App
Section titled “1. Create React App”Use the official Create React App CLI to kickstart your project:
npx create-react-app react-chrome-ext --template typescriptcd react-chrome-ext2. Update the Files
Section titled “2. Update the Files”Update App.tsx to show a simple string:
function App() {  return (    <div className="App">      Hello World    </div>  );}
export default App;
Update index.tsx:
import React from 'react';import ReactDOM from 'react-dom/client';import App from './App';import "./App.css";
const root = document.createElement("div")root.className = "container"document.body.appendChild(root)const rootDiv = ReactDOM.createRoot(root);rootDiv.render(  <React.StrictMode>    <App />  </React.StrictMode>);
Update App.css:
.App {    color: white;    text-align: center;}
.container {    width: 15rem;    height: 15rem;    background-color: green;
}
3. Install and Setup Webpack
Section titled “3. Install and Setup Webpack”Install Webpack:
npm install --save-dev webpack webpack-cli copy-webpack-plugin css-loader ts-loader html-webpack-plugin ts-nodeCreate a webpack.config.js file at the root of the project and add the following:
const path = require("path");const HTMLPlugin = require("html-webpack-plugin");const CopyPlugin = require("copy-webpack-plugin")
module.exports = {    entry: {        index: "./src/index.tsx"    },    mode: "production",    module: {        rules: [            {              test: /\.tsx?$/,               use: [                 {                  loader: "ts-loader",                   options: {                     compilerOptions: { noEmit: false },                    }                  }],               exclude: /node_modules/,            },            {              exclude: /node_modules/,              test: /\.css$/i,               use: [                  "style-loader",                  "css-loader"               ]            },        ],    },    plugins: [        new CopyPlugin({            patterns: [                { from: "manifest.json", to: "../manifest.json" },            ],        }),        ...getHtmlPlugins(["index"]),    ],    resolve: {        extensions: [".tsx", ".ts", ".js"],    },    output: {        path: path.join(__dirname, "dist/js"),        filename: "[name].js",    },};
function getHtmlPlugins(chunks) {    return chunks.map(        (chunk) =>            new HTMLPlugin({                title: "React extension",                filename: `${chunk}.html`,                chunks: [chunk],            })    );}
Update the package.json file to have the following scripts:
"scripts": { "build": "webpack --config webpack.config.js", "watch": "webpack -w --config webpack.config.js" }4. Add the Manifest File
Section titled “4. Add the Manifest File”Chrome extensions require one file which is the manifest.json. At the root of your project create this and add the following content:
{ "version": "1.0.0", "manifest_version": 3, "name": "React Chrome Extension", "description": "This is a Chrome extension built with React and TypeScript", "action": { "default_popup": "js/index.html", "default_title": "React Chrome Extension" }}5. Build the App
Section titled “5. Build the App”Run npm run build to create your application in the /dist folder.
6. Load the Extension
Section titled “6. Load the Extension”In Chrome, navigate to chrome://extensions and select “Load Unpacked”. Select the /dist directory.
You should now be able to open a page in chrome and click the extension icon in the upper right to display a big green popup. Okay, that’s a good start.
Creating a Side Panel
Section titled “Creating a Side Panel”The process to create a Side Panel is fairly straightforward now that we have the basic infrastructure in place.
1. Install the Chrome Types
Section titled “1. Install the Chrome Types”Since we will be using the global chrome namespace in our TypeScript project, we need to install the appropriate types:
npm i @types/chrome2. Create a Service Worker
Section titled “2. Create a Service Worker”In the /src directory of your project, create a background.ts file and add the following code:
chrome.runtime.onInstalled.addListener(() => {  chrome.sidePanel.setPanelBehavior({ openPanelOnActionClick: true });});
export {}
3. Update the Manifest File
Section titled “3. Update the Manifest File”First, add the sidePanel permission to the permissions list. Next, add a side_panel field with a nested default_path argument that points to your index.html file. The updated Manifest file should look like this.
{ "version": "1.0.0", "manifest_version": 3, "name": "React Chrome Extension", "description": "This is a Chrome extension built with React and TypeScript", "permissions": [ "sidePanel" ], "side_panel": { "default_path": "js/index.html" }, "background": { "service_worker": "js/background.js" }}4. Update the Webpack Config
Section titled “4. Update the Webpack Config”In your webpack.config.js file, add a new line to the entry object for the background script:
entry: { index: "./src/index.tsx", background: "./src/background.ts" },5. Build the Extension
Section titled “5. Build the Extension”Run npm run build again to update your extension.
6. Reload the Extension
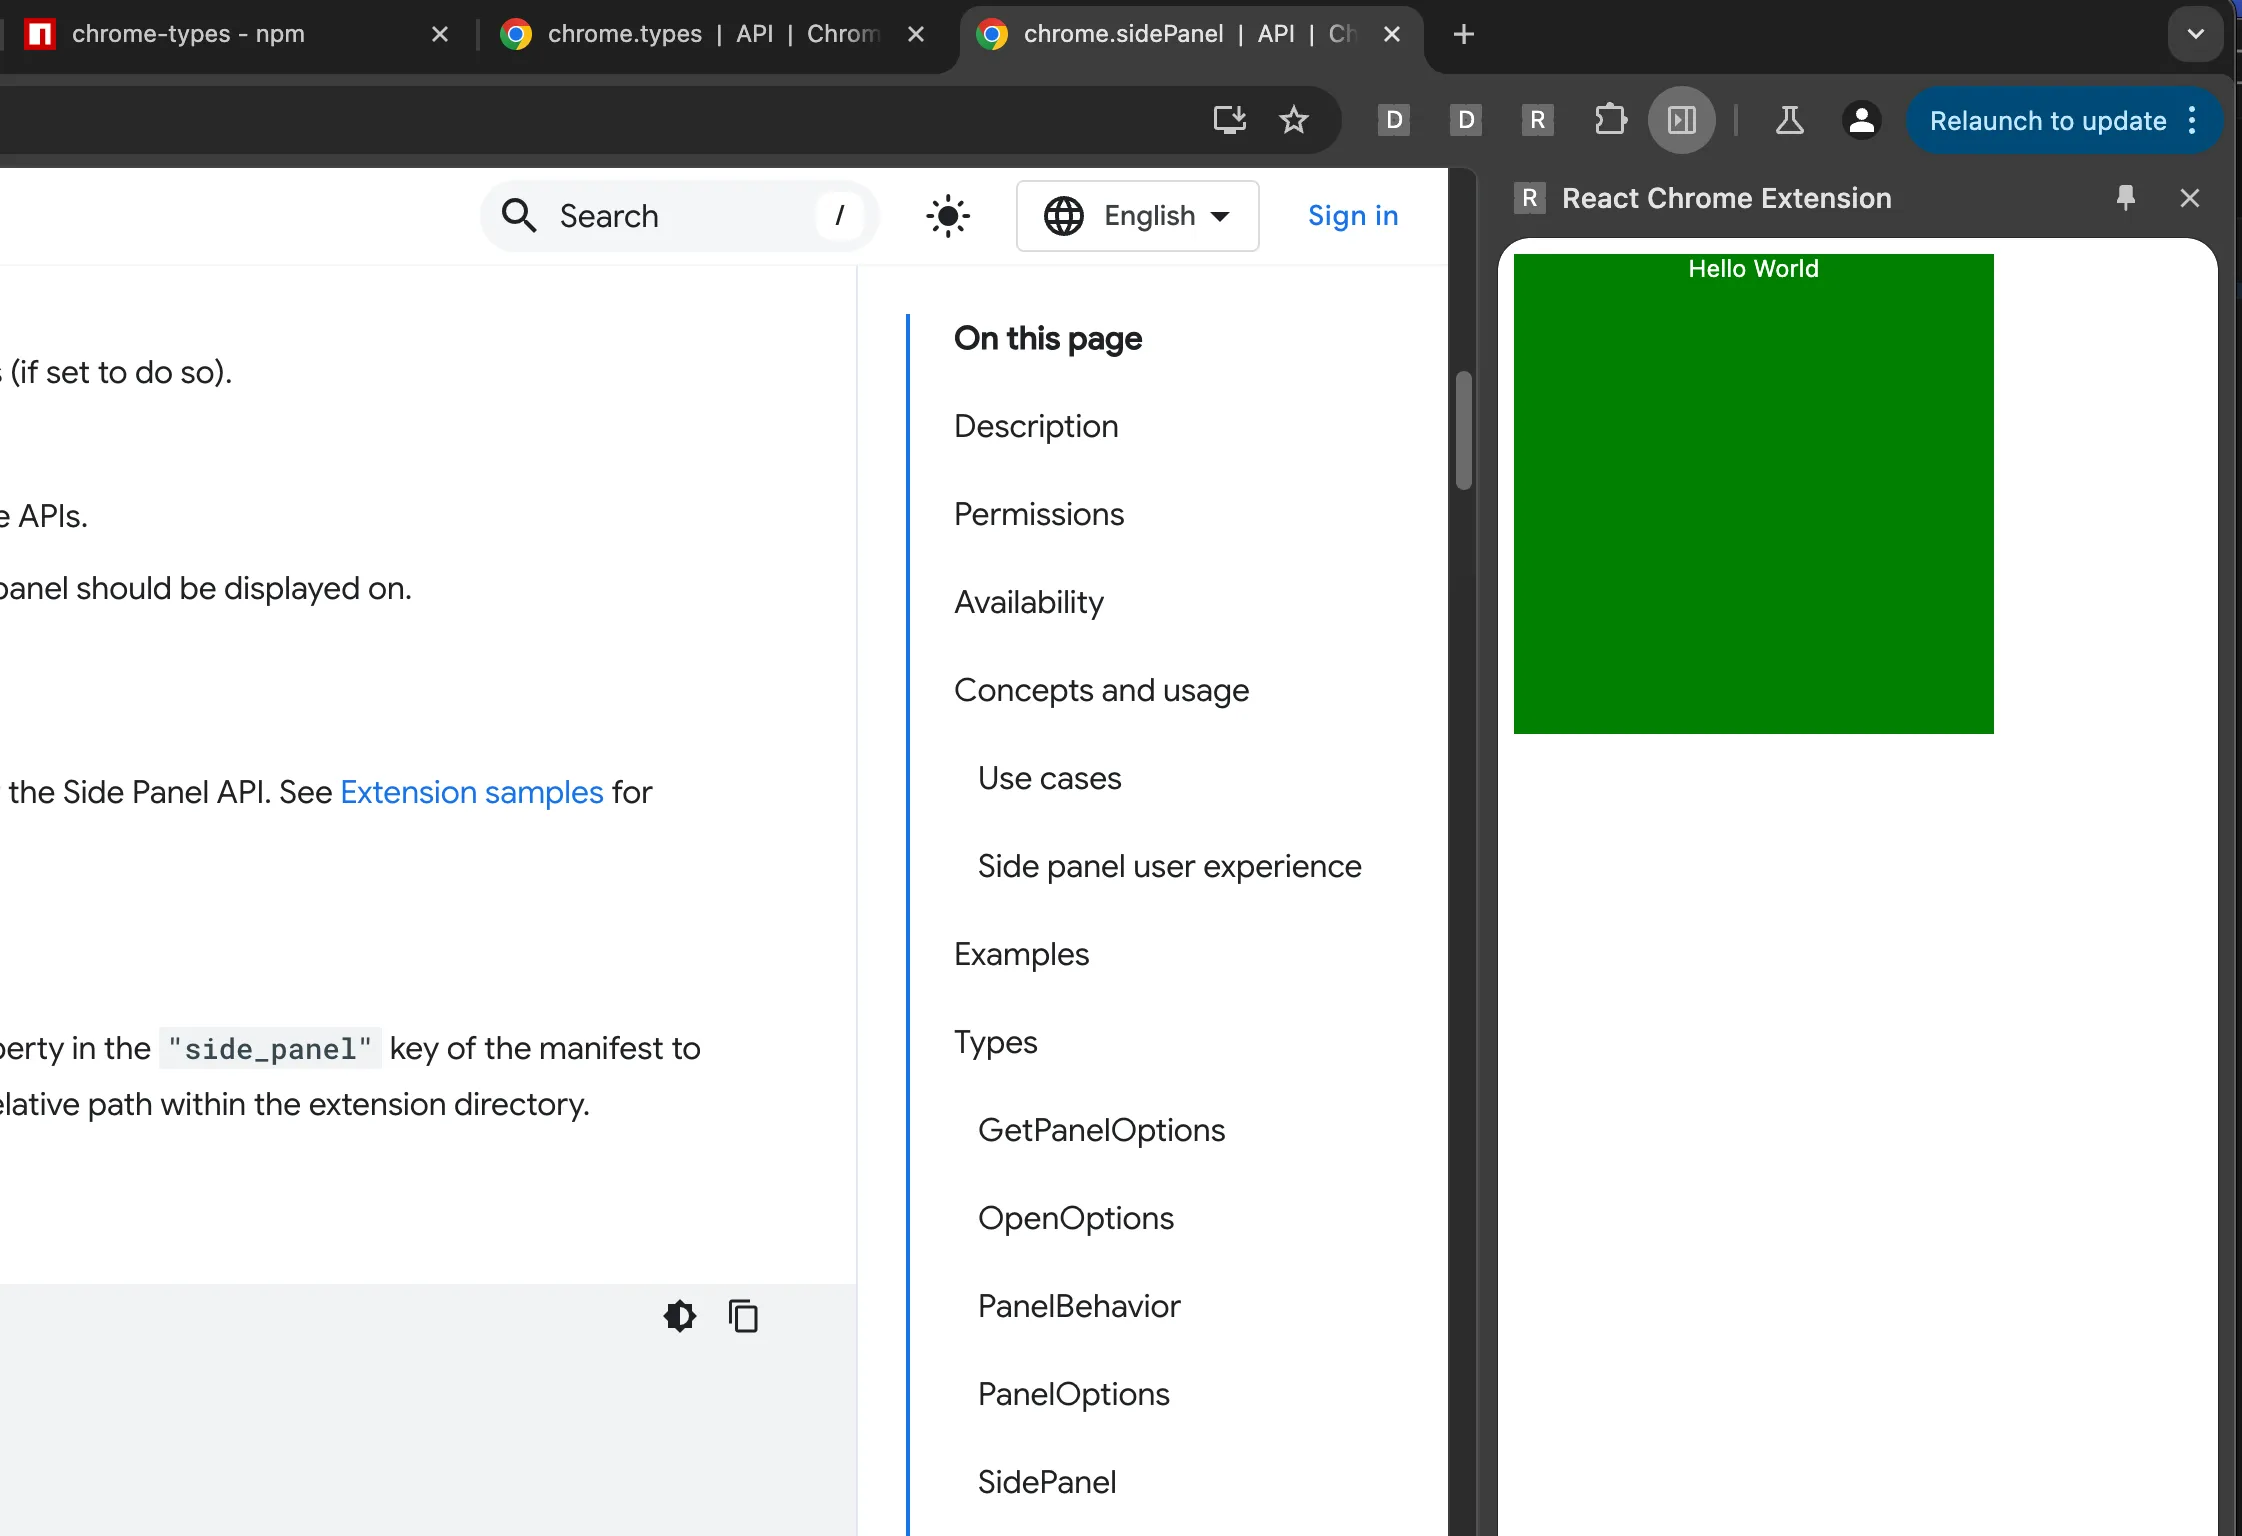
Section titled “6. Reload the Extension”In chrome, navigate to the chrome://extensions page again and reload the extension. Now when you click on the icon, it should open the side panel showing the same large green box.
Organize your Project
Section titled “Organize your Project”If you have opinions on how to write software, you probably feel a strong pull to organize the files of your project. Normally this is effortless but not for React Chrome extensions. If you move a file in this project, you will need to update the webpack.config.js and (sometimes) the manifest.json files to point to the correct location.
1. Move the background.ts File
Section titled “1. Move the background.ts File”I like to put files that affect the entire app in an /app folder so I’ll move the background.ts file there.
2. Update the Webpack Config
Section titled “2. Update the Webpack Config”Now that we’ve transplanted the background.ts file, we need to tell the Webpack config where to find it:
entry: { index: "./src/index.tsx", background: "./src/app/background.ts" },In this case the background.js file will still be located at the same location in the /dist folder so we odn’t have to update the manifest.json:
"background": { "service_worker": "js/background.js" }3. Build and Reload the Extension
Section titled “3. Build and Reload the Extension”Running npm run build and refreshing the extension one more time should give us an extension that works the same as before. Clicking on the icon should open the side panel ✅
Add More Folders
Section titled “Add More Folders”Where things get a bit more complicated is when you want to create separate React components for each part of your extension; side panel, options page, popup, etc. Just as with the background.ts file, you can move these other components anywhere but there are a few requirements to make it all work.
Each component requires two files: an index.tsx and the component file (e.g. SidePanel.tsx).
1. Create the Files
Section titled “1. Create the Files”For this example, I’ll be creating my side panel component in the /src/features/side_panel/ folder.
Create an index.tsx file:
import React from 'react';import ReactDOM from 'react-dom/client';import SidePanel from './SidePanel';
const root = document.createElement("div")root.className = "container"document.body.appendChild(root)const rootDiv = ReactDOM.createRoot(root);rootDiv.render(  <React.StrictMode>    <SidePanel />  </React.StrictMode>);
Create a SidePanel.tsx file:
function SidePanel() {  return <div className="SidePanel">Side Panel</div>;}
export default SidePanel;
2. Update the Webpack Config
Section titled “2. Update the Webpack Config”We’ll need to update the entry field in the Webpack config to point to the new side panel index.tsx. The value you add as the key in the map will determine where in the /dist folder the files are generated:
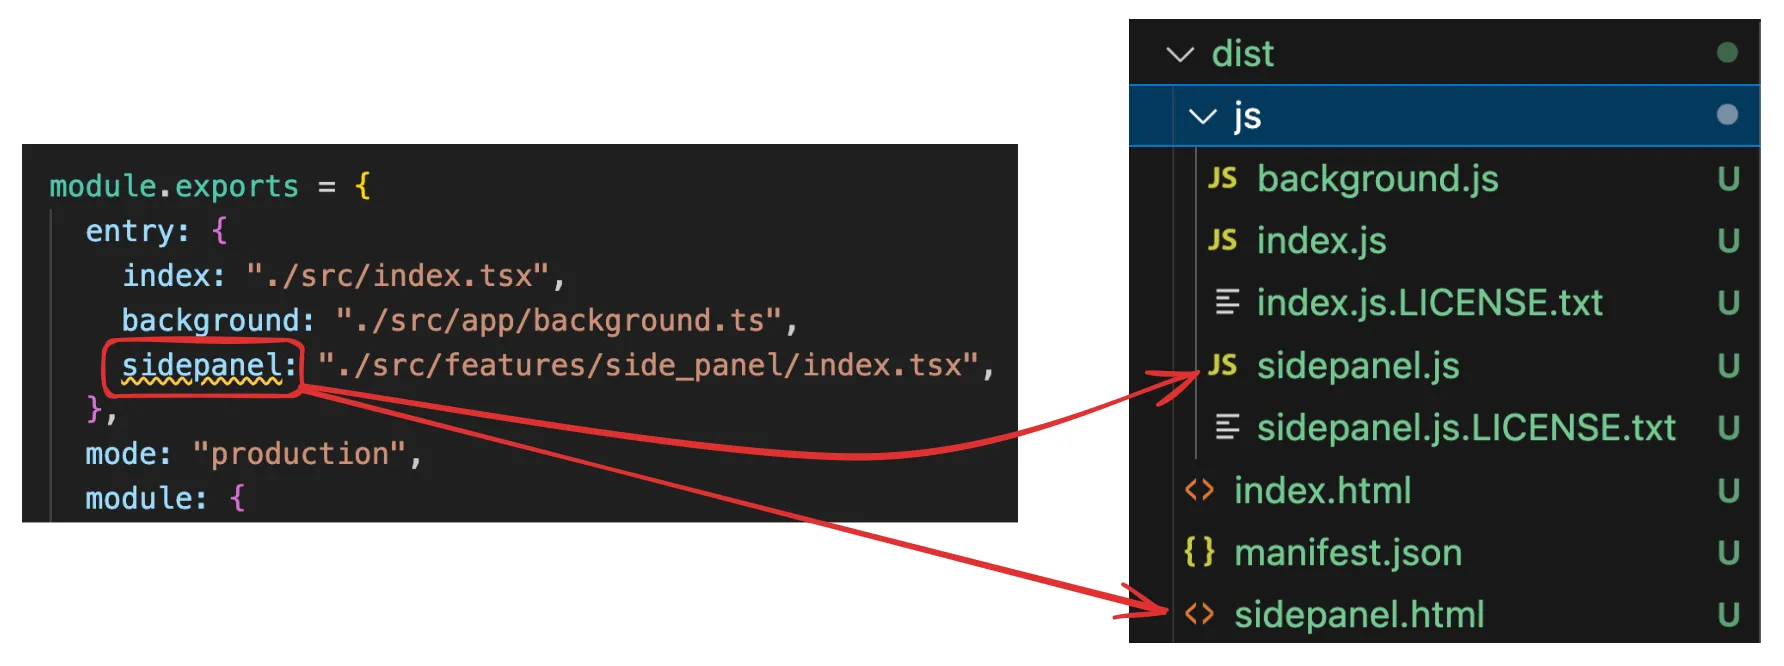
The value (on the left side) is where Webpack can find your file.
In addition to this change, you will also need to update the HTML Plugin configuration to add the sidepanel:
const path = require("path");const HTMLPlugin = require("html-webpack-plugin");const CopyPlugin = require("copy-webpack-plugin");
module.exports = {  entry: {    index: "./src/index.tsx",    background: "./src/app/background.ts",   sidepanel: "./src/features/side_panel/index.tsx",  },  mode: "production",  module: {    rules: [      {        test: /\.tsx?$/,        use: [          {            loader: "ts-loader",            options: {              compilerOptions: { noEmit: false },            },          },        ],        exclude: /node_modules/,      },      {        exclude: /node_modules/,        test: /\.css$/i,        use: ["style-loader", "css-loader"],      },    ],  },  plugins: [    new CopyPlugin({      patterns: [{ from: "manifest.json", to: "manifest.json" }], // Adjusted path    }),   ...getHtmlPlugins(["index", "sidepanel"]),  ],  resolve: {    extensions: [".tsx", ".ts", ".js"],  },  output: {    path: path.join(__dirname, "dist"),    filename: "js/[name].js",   publicPath: "/",  },};
function getHtmlPlugins(chunks) {  return chunks.map(    (chunk) =>      new HTMLPlugin({        title: "React extension",        filename: `${chunk}.html`,        chunks: [chunk],      })  );}
3. Update the Manifest File
Section titled “3. Update the Manifest File”Now that we’ve created a new sidepanel.html file in the /dist folder, we can use it in the manifest.json:
{ "version": "1.0.0", "manifest_version": 3, "name": "React Chrome Extension", "description": "This is a Chrome extension built with React and TypeScript", "permissions": [ "sidePanel" ], "side_panel": { "default_path": "sidepanel.html" }, "background": { "service_worker": "js/background.js" }}4. Build and Reload the Extension
Section titled “4. Build and Reload the Extension”Run npm run build one more time and reload the extension. Clicking on the extension icon should again open up the sidebar with the big green box, only this time you have a custom folder structure under the hood.
You can expand on this to add separate components for the Options page and Popup.
Communicate Between Components
Section titled “Communicate Between Components”Since each component we’ve created runs in a separate context, we need to be creative with how they communicate with one another. One way to pass realtime data between them is using Chrome’s Messaging API.
1. Create the Message Sender
Section titled “1. Create the Message Sender”In this example, I will be having my Options.tsx component send data to my SidePanel.tsx component. Here is the Options.tsx:
function Options() {  const sendMessage = () => {    chrome.runtime.sendMessage(      { type: "UPDATE_FROM_OPTIONS", payload: "Hello SidePanel" },      (response) => {        console.log("Response from SidePanel:", response);      }    );  };
  return (    <div className="App">      Options      <button onClick={sendMessage}>Send Message to SidePanel</button>    </div>  );}
export default Options;
2. Create the Message Receiver
Section titled “2. Create the Message Receiver”To receive the message, my SidePanel.tsx file will listen for all messages sent using chrome.runtime. Here is the SidePanel.tsx:
function SidePanel() {  useEffect(() => {    chrome.runtime.onMessage.addListener((message, sender, sendResponse) => {      if (message.type === "UPDATE_FROM_OPTIONS") {        // Handle the message        console.log("Received message in SidePanel:", message.payload);        sendResponse({ status: "Received by SidePanel" });      }    });  }, []);
  return <div className="App">Side Panel</div>;}
export default SidePanel;
3. Reload and Test
Section titled “3. Reload and Test”After reloading the extension, first open the side panel by clicking on the extension icon. Then, right-click the icon and open the options page. From here, you should be able to press the button and send a message to the side panel (to see the console message, right click in the side panel and select “inspect”).
4. Mediate Messages
Section titled “4. Mediate Messages”If you need to mediate messages between components, use the background script:
// In background.tschrome.runtime.onMessage.addListener((message, sender, sendResponse) => { if (message.type === 'UPDATE_FROM_OPTIONS') { // Forward the message to SidePanel chrome.runtime.sendMessage(message, (response) => { sendResponse(response); }); return true; // Keep the messaging channel open for sendResponse }});5. Update Shared State
Section titled “5. Update Shared State”Messages sent using the Messages API are transient so if your extension requires more persistent data storage, you can use Chrome’s Storage API. Here’s a brief example:
// In Options.tsxchrome.storage.local.set({ sharedData: 'Some data' }, () => {  console.log('Data is set in storage');});
// In SidePanel.tsxchrome.storage.local.get(['sharedData'], (result) => {  console.log('Data retrieved from storage:', result.sharedData);});
Add Tailwind
Section titled “Add Tailwind”To use TailwindCSS throughout your extension follow these steps.
1. Install Tailwind and PostCSS
Section titled “1. Install Tailwind and PostCSS”npm install -D tailwindcss postcss autoprefixer2. Initialize Tailwind
Section titled “2. Initialize Tailwind”Run the following command to generate tailwind.config.js and postcss.config.js files at the root of your project:
npx tailwindcss init -pEnsure the tailwind.config.js file can find your source files:
/** @type {import('tailwindcss').Config} */module.exports = { content: [ "./src/**/*.{js,jsx,ts,tsx,html}", // Adjust this path based on your project structure ], theme: { extend: {}, }, plugins: [],};3. Add the Tailwind Base Styles
Section titled “3. Add the Tailwind Base Styles”In your App.css file, add the Tailwind styes:
@tailwind base;@tailwind components;@tailwind utilities;4. Update the Webpack Config
Section titled “4. Update the Webpack Config”Finally, add the postcss-loader to the css module in the webpack.config.js file:
module: { rules: [ // TypeScript loader { test: /\.tsx?$/, use: 'ts-loader', exclude: /node_modules/, }, // CSS and PostCSS loader { test: /\.css$/i, use: ['style-loader', 'css-loader', 'postcss-loader'], }, ], },The code I shared above is already using the App.css file but if you add the Tailwind styles to a different file, you’ll need to add that as an import in each index.tsx file. For example:
import React from 'react';import ReactDOM from 'react-dom/client';import '../../tailwind.css'; // Import Tailwind CSSimport Options from './Options';
const root = document.createElement('div');root.className = 'container';document.body.appendChild(root);const rootDiv = ReactDOM.createRoot(root);rootDiv.render(  <React.StrictMode>    <Options />  </React.StrictMode>);
Conclusion
Section titled “Conclusion”With this setup, you should be able to build robust Chrome extensions using the React framework and TailwindCSS. Happy coding ☕️